|
|
|

|
|
|
|
One 3 and 3/4 wheel 1993 Integra! |
|
|
|
|
|
|
|
|

|
|
|
|
The steel I-beam frame welded! God I love stick welding. The feeling of power! |
|
|
|
|
|
|
|
|

|
|
|
|
Top frame sitting on the support frame. Shims allow easy levelling. |
|
|
|
|
|
|
|

|
|
|
|
Top frame sitting on the support frame. Shims allow easy levelling. |
|
|
|
|
|
|
|

|
|
|
|
Finally finished! Dead level and flat! |
|
|
|
|
|
|
|
|

|
|
|
|
How do you get a motor and gearbox out of an Integra? Chop the front of the car off of course! |
|
|
|
|
|
|
|

|
|
|
|
Motor and gearbox out and on the deck courtesy of Harbor Freight! Pleasently surprised as to the quality of their One Ton lift! |
|
|
|
|
|
|
|

|
|
|
|
The motor and gearbox where they need to be ... on the table! |
|
|
|
|
|
|
|
|

|
|
|
|
And completely stripped, inside and out! |
|
|
|
|
|
|
|

|
|
|
|
Lots of lovely parts to play with. |
|
|
|
|
|
|
|

|
|
|
|
Manifold dropping under the sump... |
|
|
|
|
|
|
|
|

|
|
|
|
... and out the back with the offending gearbox selector input shaft. |
|
|
|
|
|
|
|

|
|
|
|
Front of the engine - nice and easy as all belts are seperate. |
|
|
|
|
|
|
|
|
|
|
|

|
|
|
|
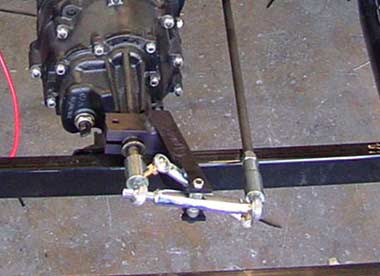
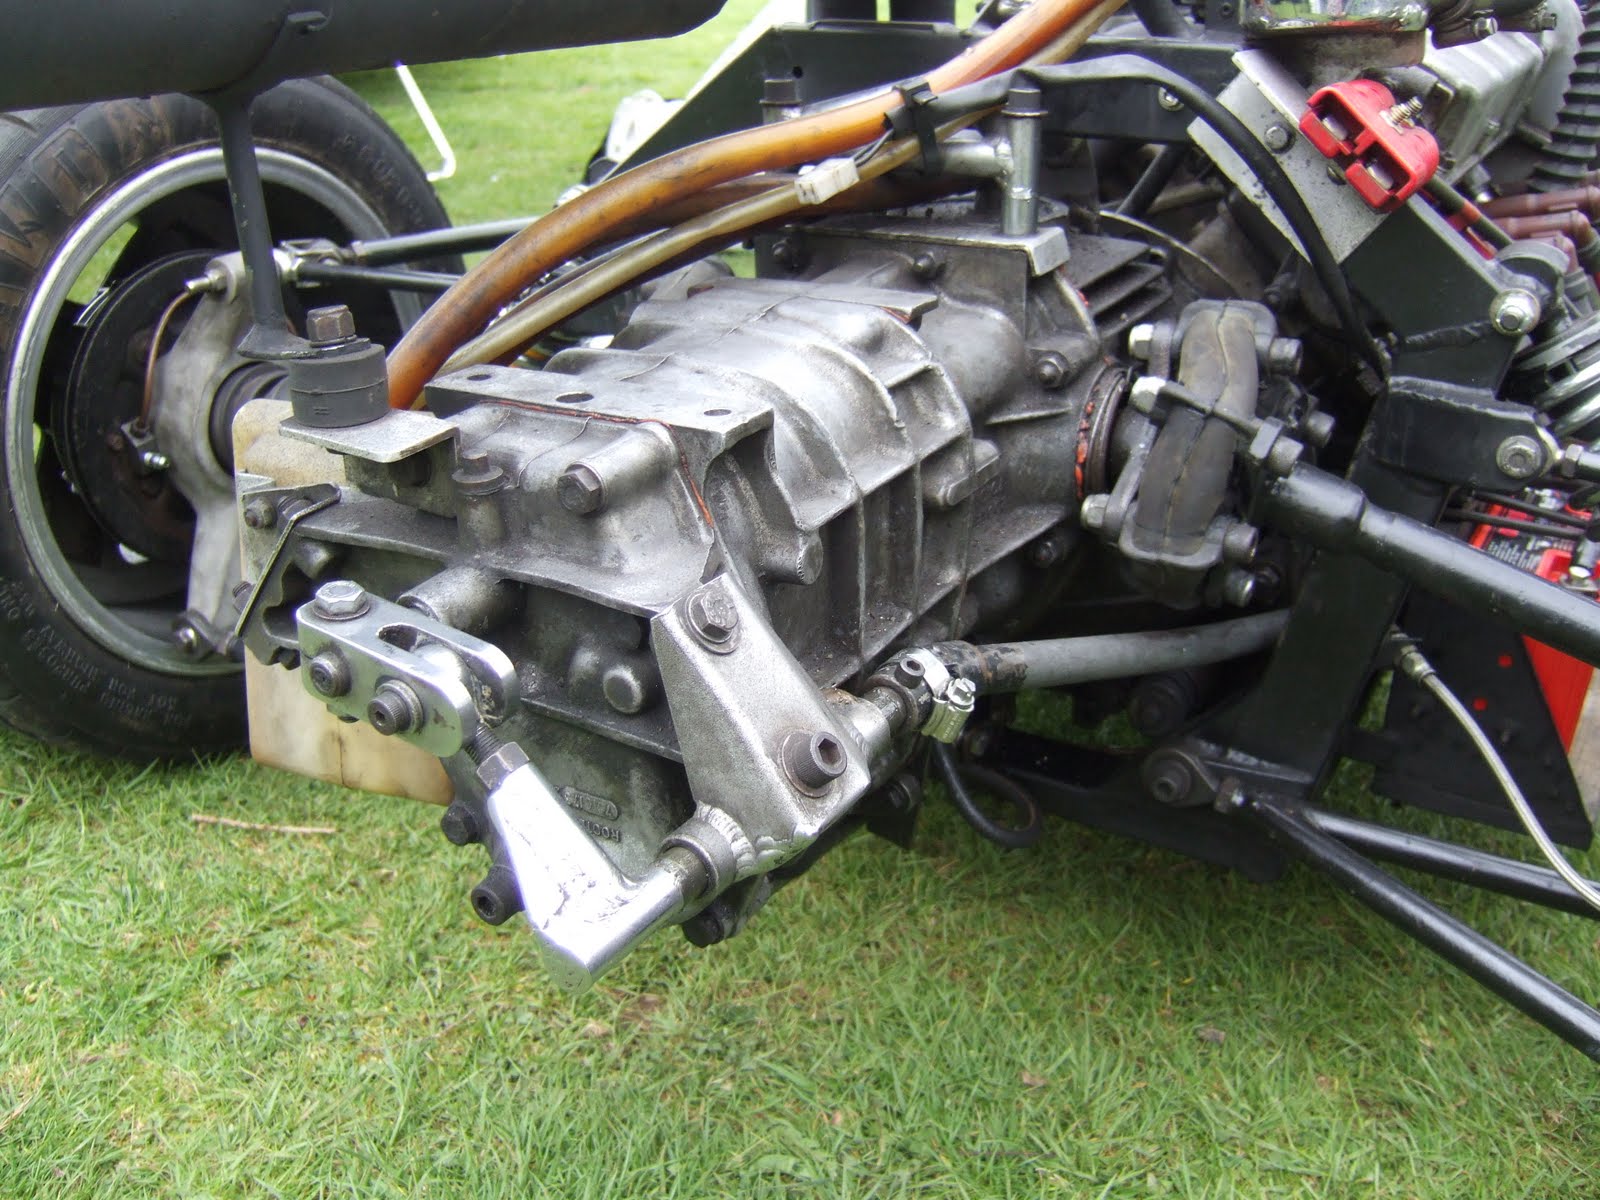
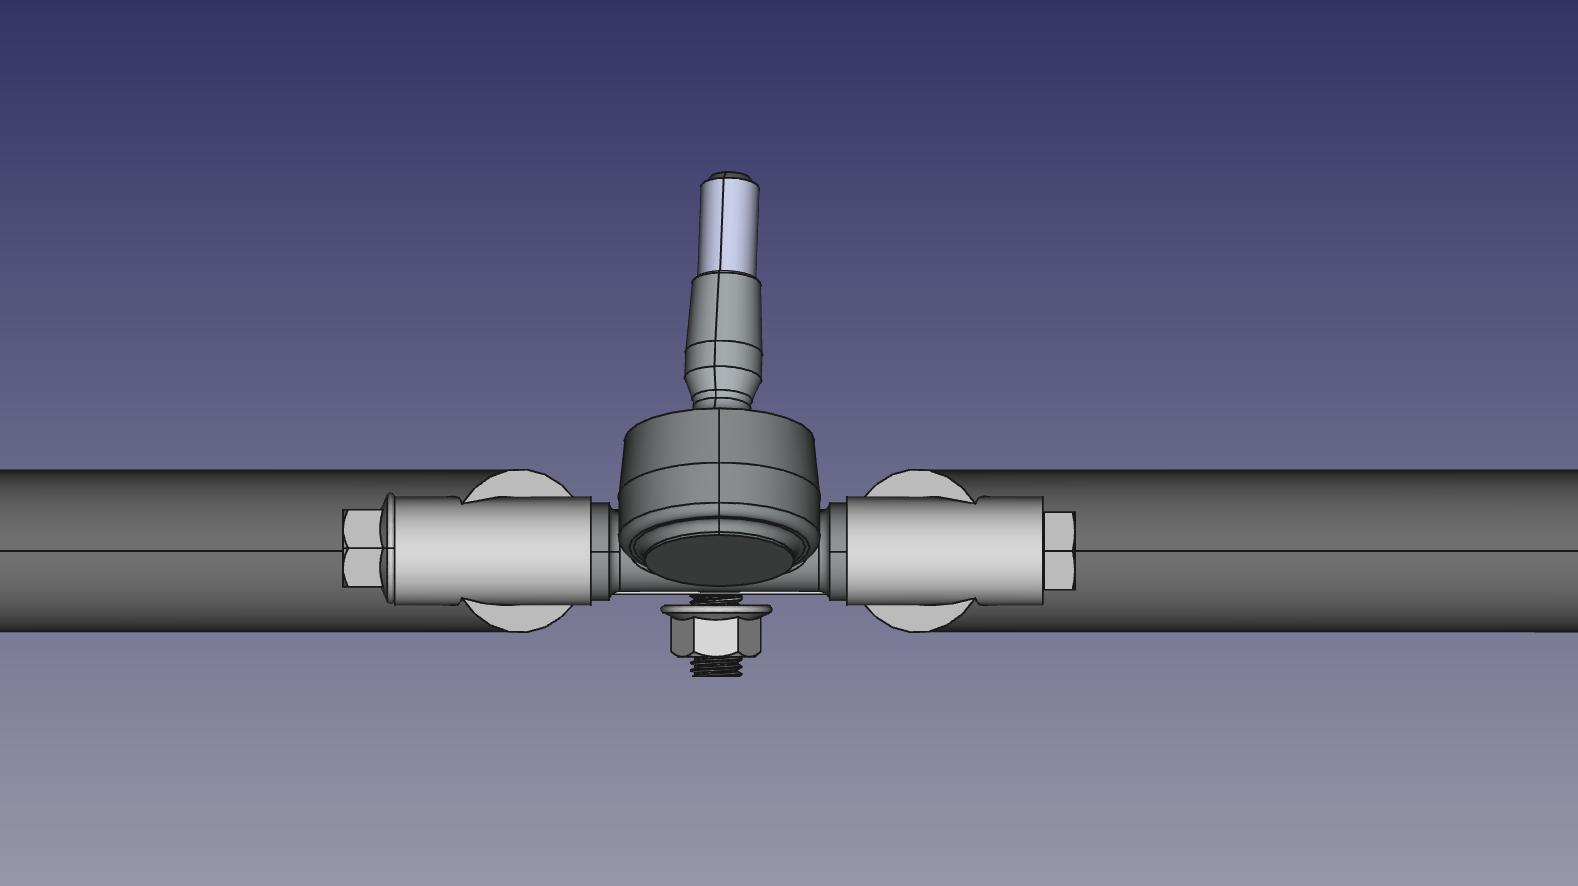
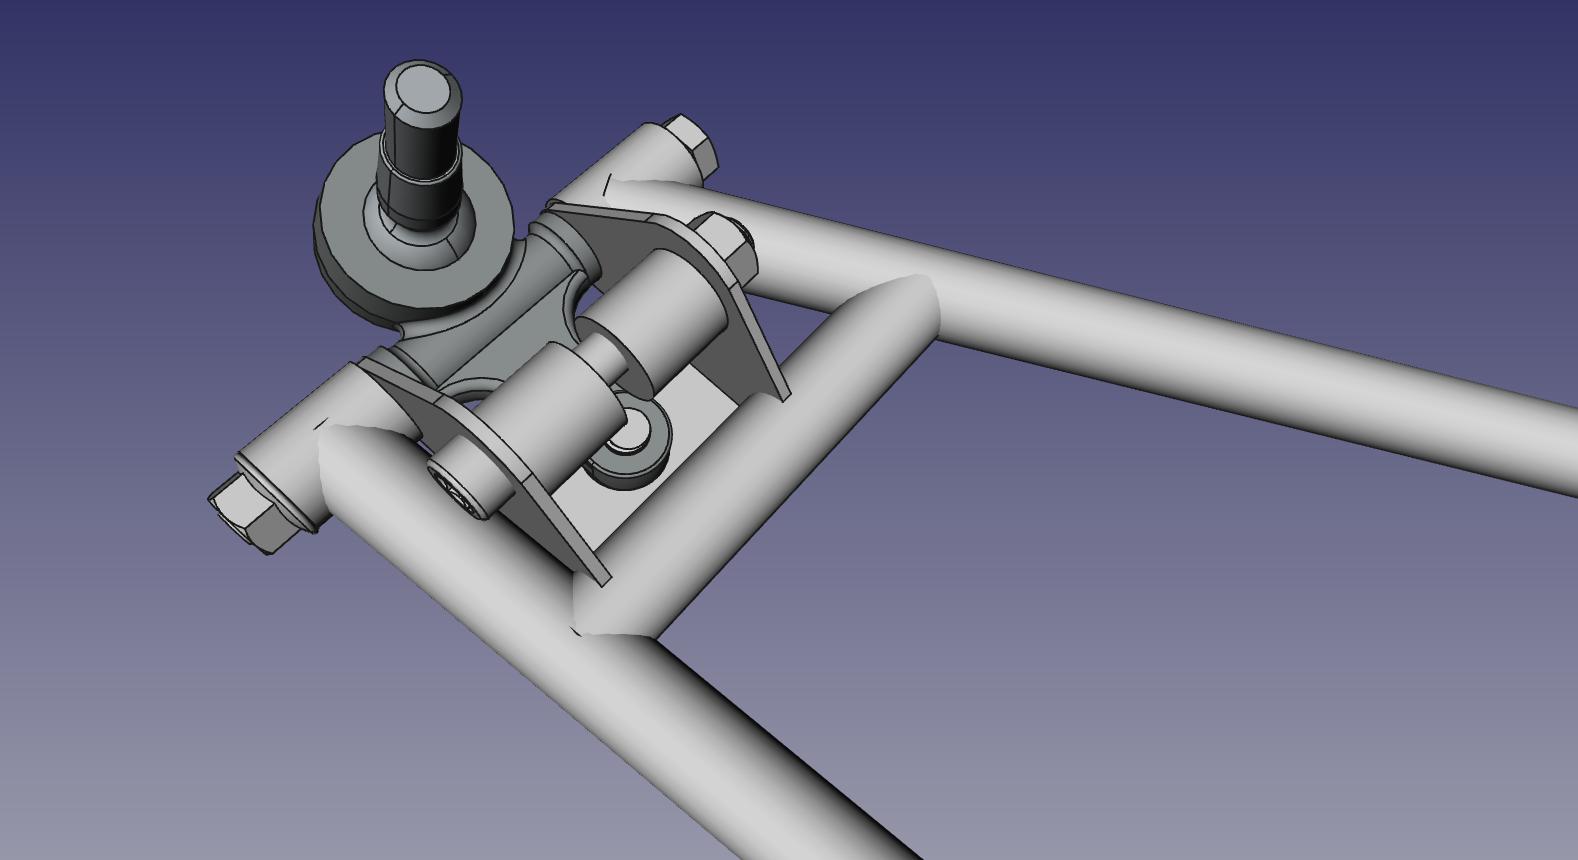
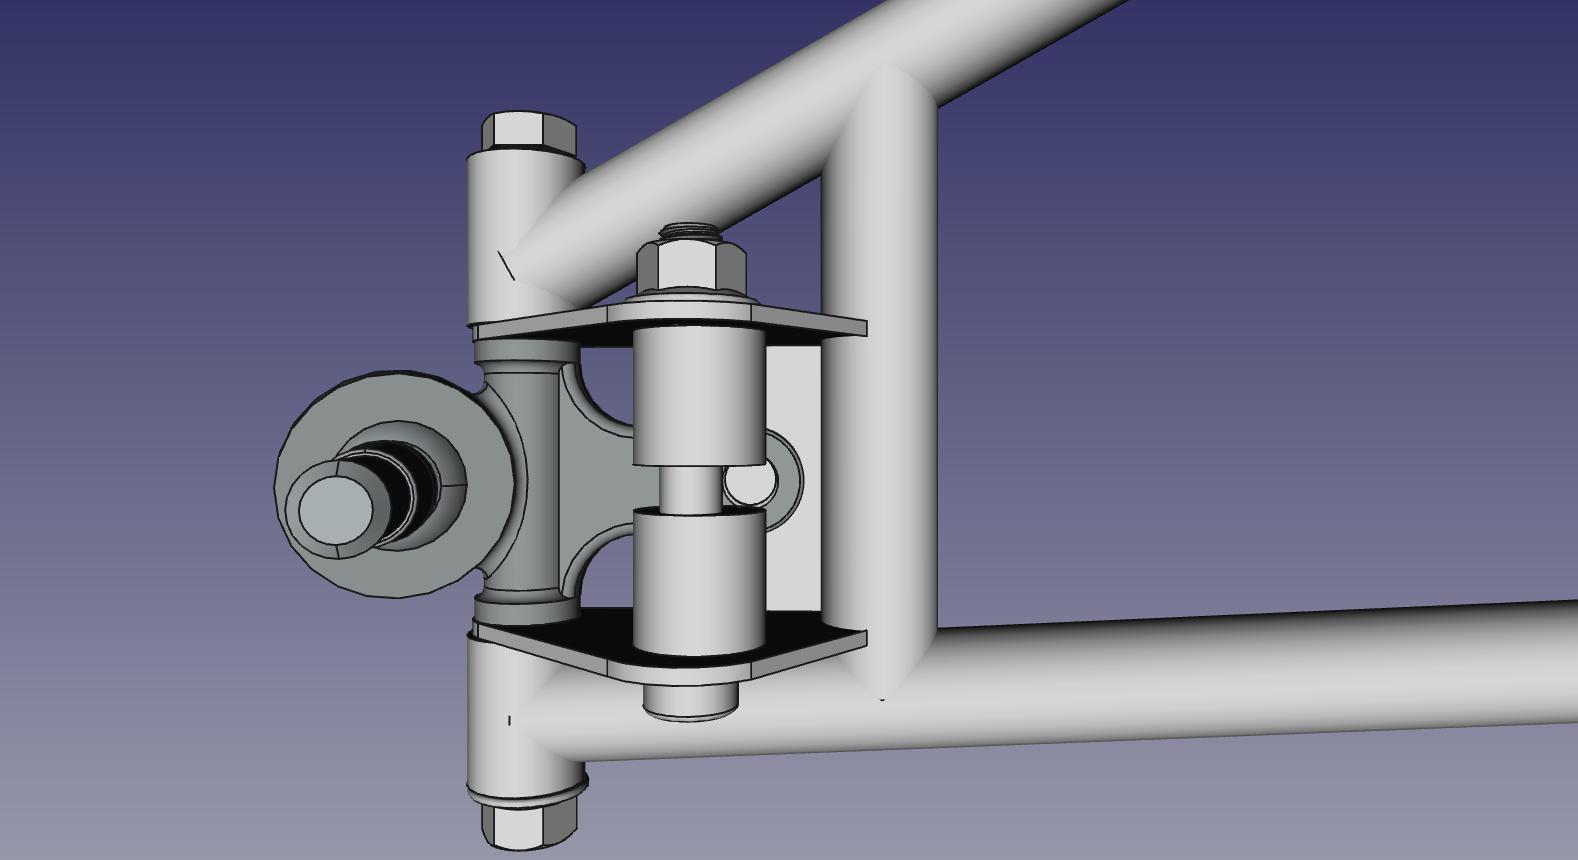
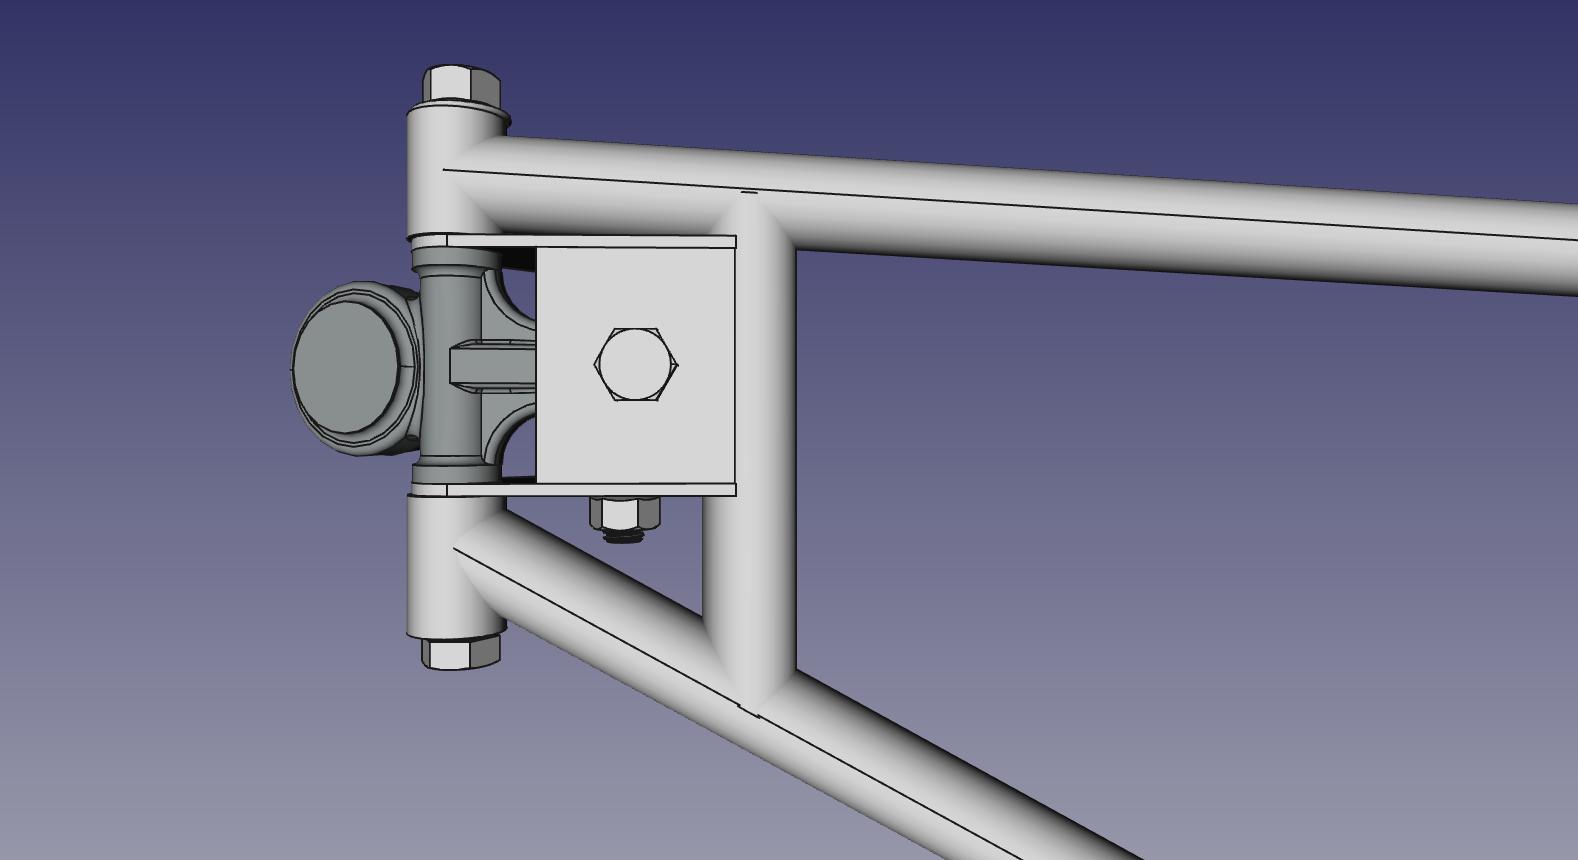
The final gearshift design! |
|
|
|
|
|
|
|
|

|
|
|
|
The final gearshift design! |
|
|
|
|
|
|
|

|
|
|
|
Gear lever from a Lotus 35 |
|
|
|
|
|
|
|

|
|
|
|
Digital level and angle finder |
|
|
|
|
|
|
|
|

|
|
|
|
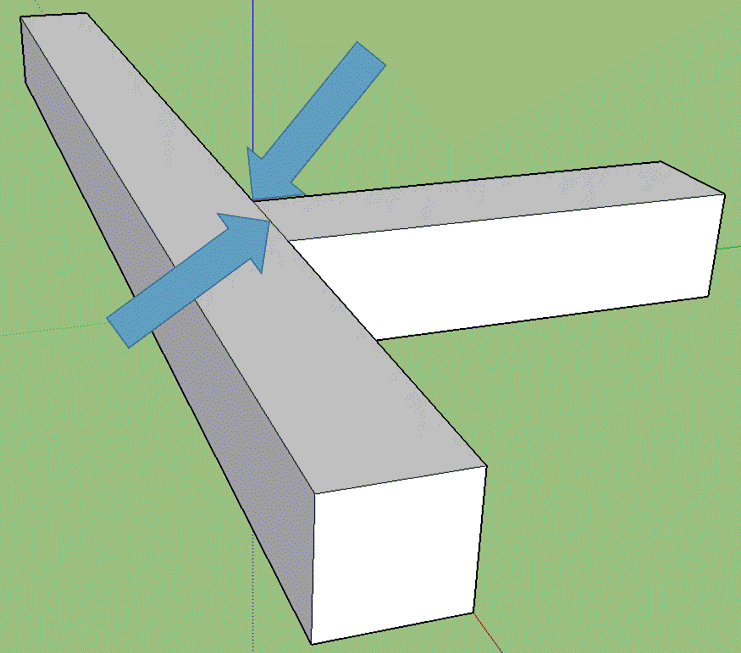
FreeCad Basic Midlana Chassis |
|
The Basic Chassis modelled up with FreeCAD. |
|
|
|
|
|

|
|
|
|
Welding Cart finished off in the brightest yellow I could find |
|
|
|
|
|
|
|

|
|
|
|
Official start - Dec. 24th, 2017! |
|
|
|
|
|
|
|
|

|
|
|
|
The first cut! Section 300 cut and on the table! Cat inspected and approved! |
|
|
|
|
|
|
|

|
|
|
|
Four done! A friend lent me a quality bandsaw which makes the cuts soooo easy! |
|
|
|
|
|
|
|
|
|

|
|
|
|
Base Chassis cutting and measuring complete. 9 hours start to finish. |
|
|
|
|
|
|
|

|
|
|
|
Front end corrected and adapted for in-board suspension |
|
|
|
|
|
|
|

|
|
|
|
Testing my welding - prepare for pain! |
|
|
|
|
|
|
|
|
|

|
|
|
|
Base chassis all tacked up. Square, symetrical and level. Result! |
|
|
|
|
|
|
|

|
|
|
|
Obligatory test drive along with "vroom vroom" noises! |
|
|
|
|
|
|
|
|

|
|
|
|
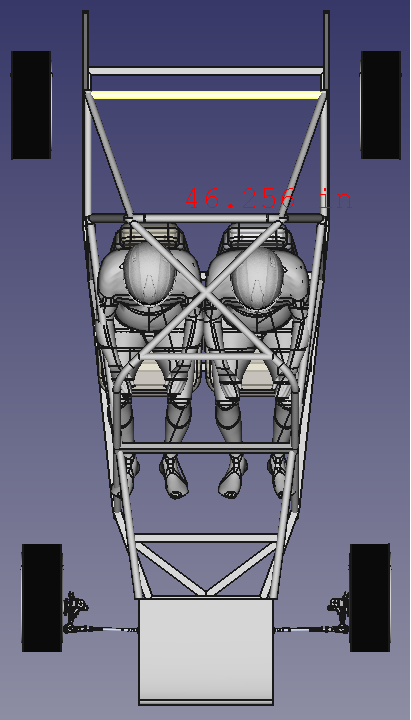
Virtual chassis after 19 Jan 2017. Chassis heightened to accomodate me! |
|
|
|
|
|
|
|

|
|
|
|
Side view of virtual Chassis |
|
|
|
|
|
|
|
|
|
|
|
|
|
|

|
|
|
|
How many options on roll-cage can you have???? |
|
|
|
|
|
|
|
|
|
|

|
|
|
|
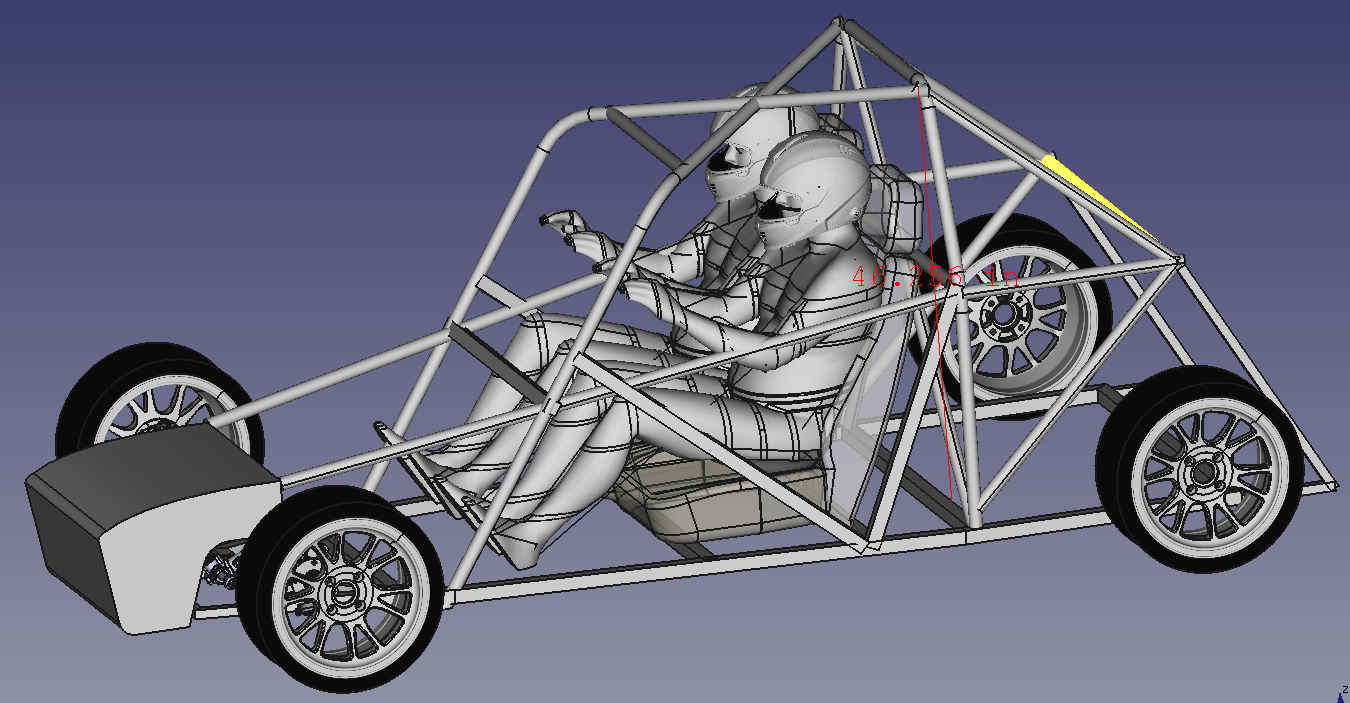
Latest version of the Virtual Chassis. Liking it! |
|
|
|
|
|
|
|

|
|
|
|
Front suspension fixture looking good! |
|
|
|
|
|
|
|
|

|
|
|
|
Rear suspension fixture - that was a bear! |
|
|
|
|
|
|
|
|
|
|
|
|
|
|
|
|
|
|

|
|
|
|
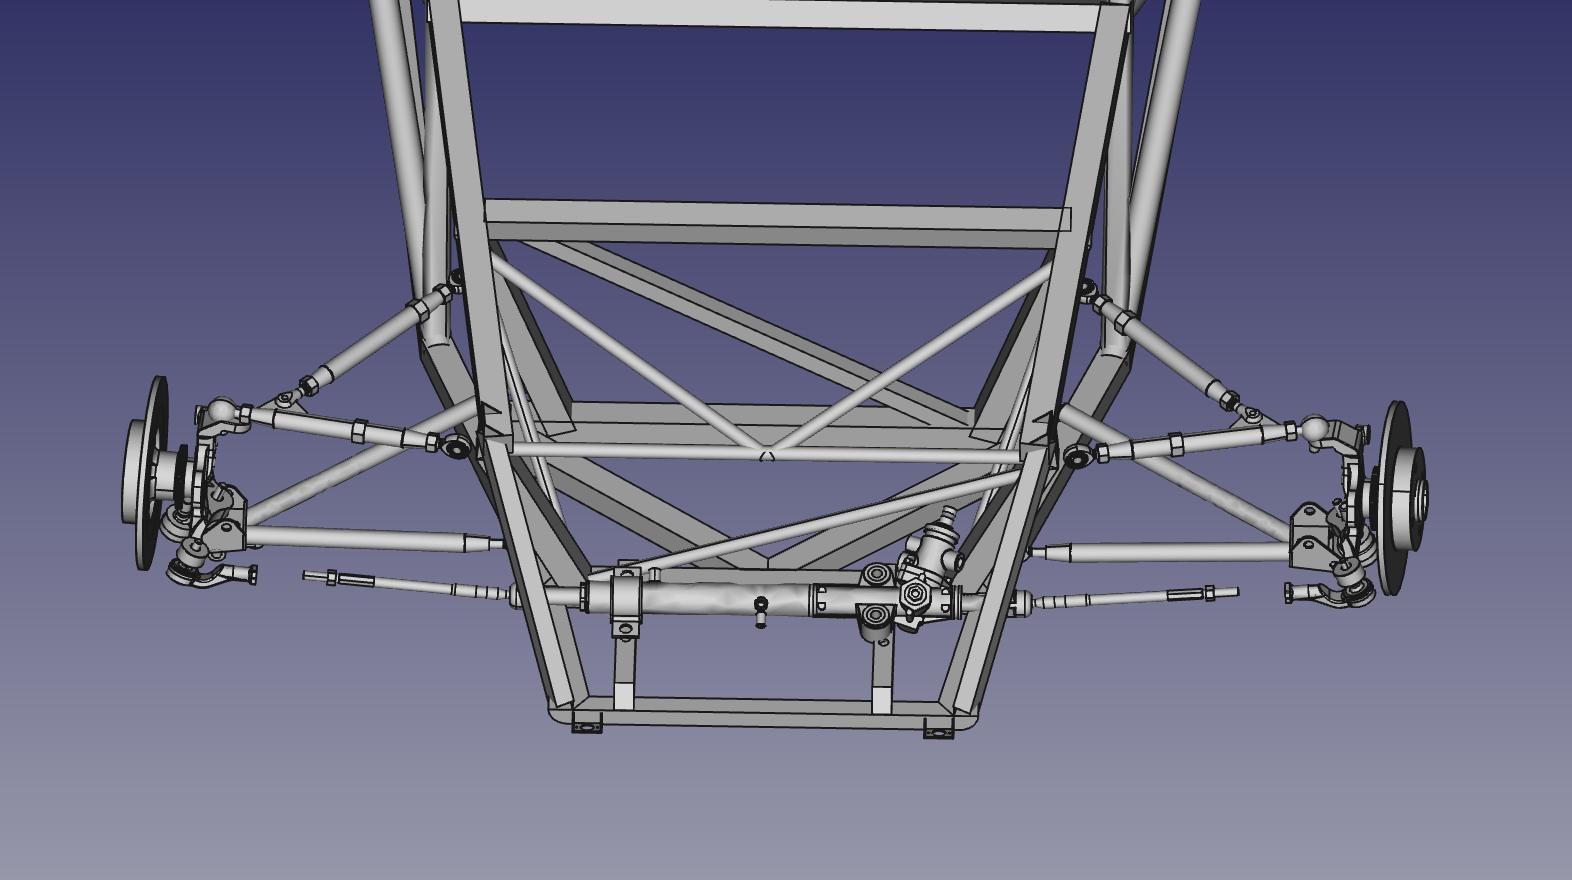
Virtual world coming on nicely! |
|
|
|
|
|
|
|
|
|
|

|
|
|
|
Roll hoop fabbed and in place! Beep you bastard! |
|
|
|
|
|
|
|

|
|
|
|
One Midlana Suspension kit! |
|
|
|
|
|
|
|

|
|
|
|
While it's easy to work with I'm not sure I trust these new plastic roll cages. |
|
|
|
|
|
|
|
|
|

|
|
|
|
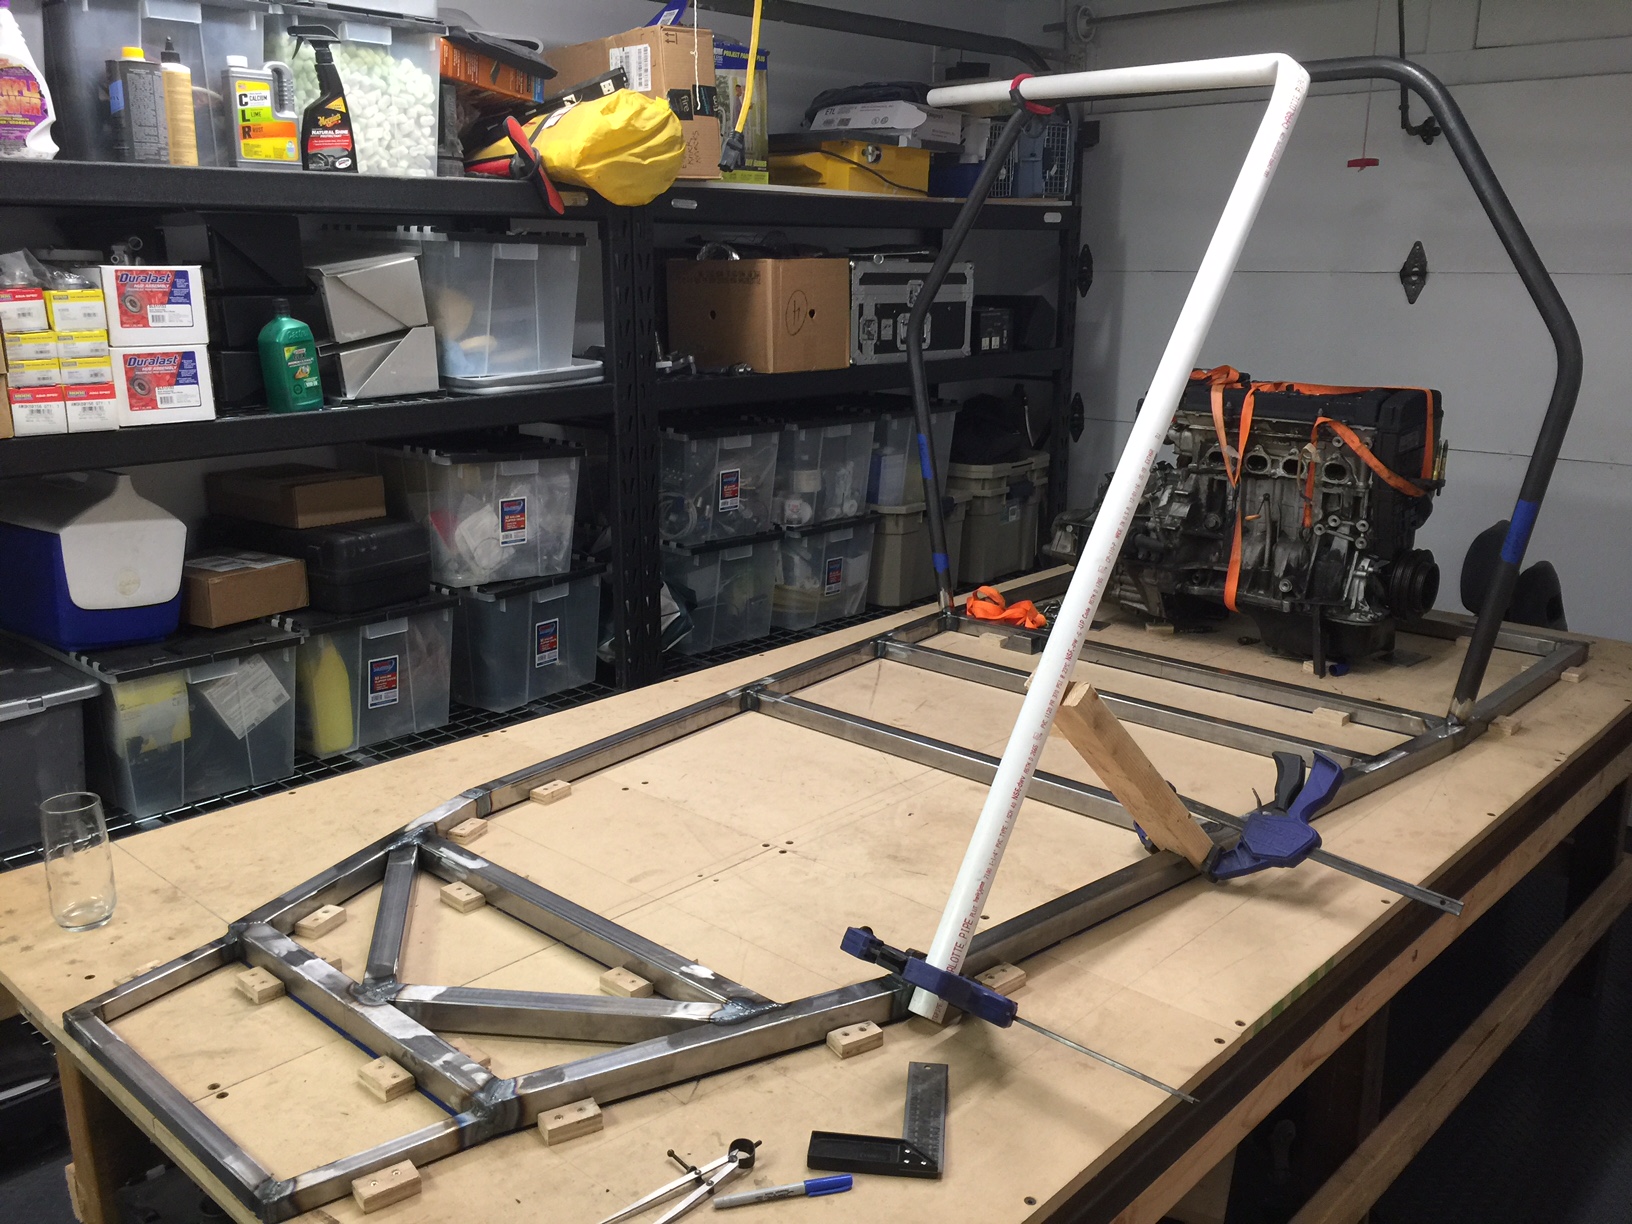
Wooden frame to make mounting the roll cage easier. |
|
|
|
|
|
|
|

|
|
|
|
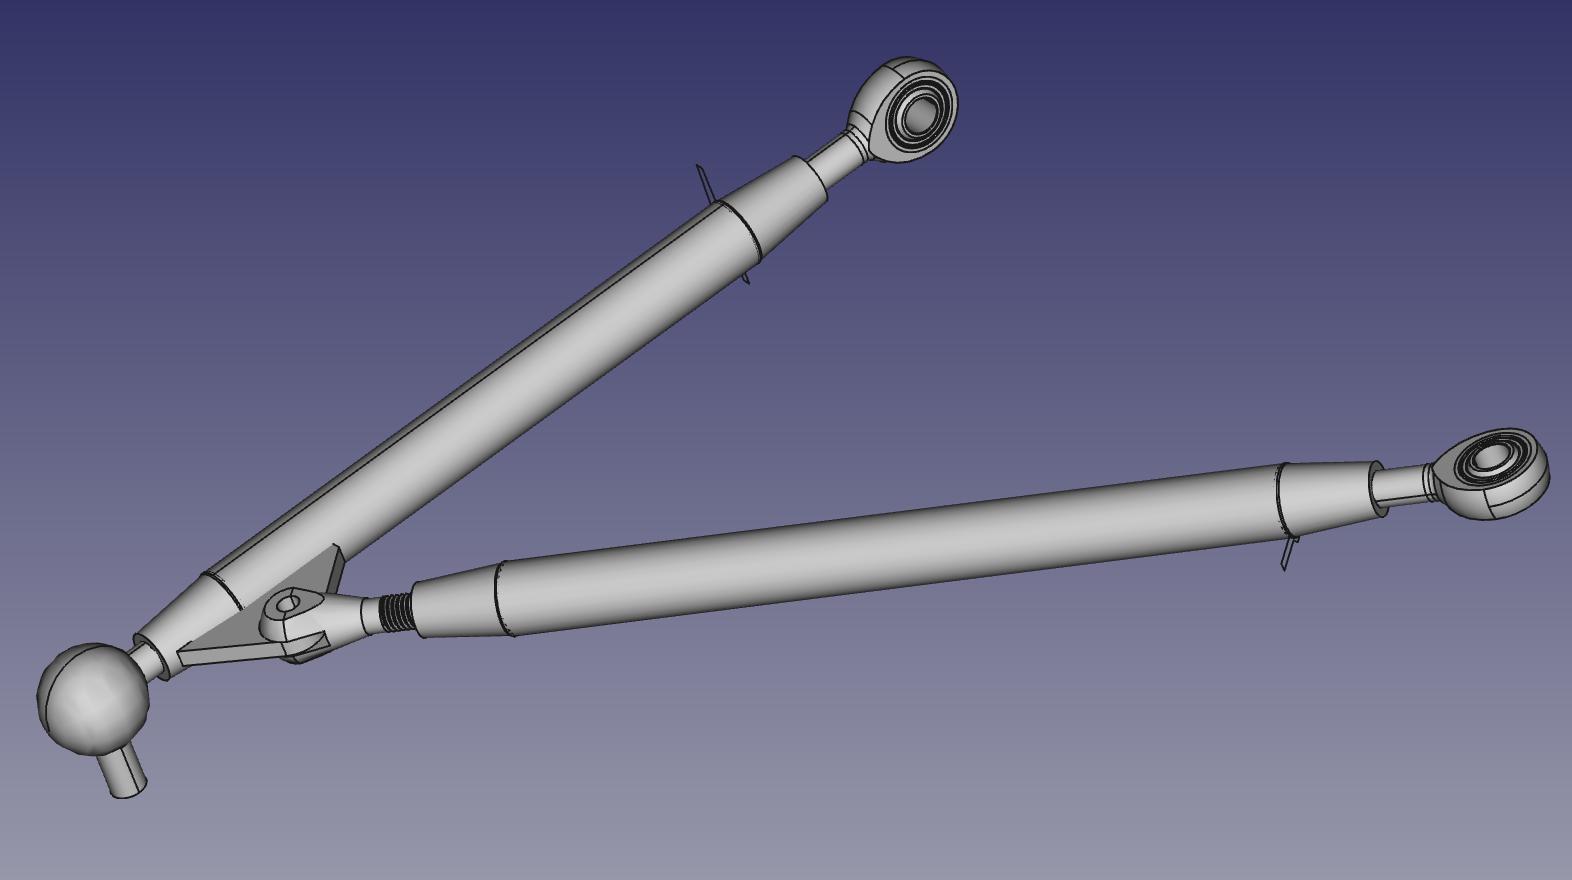
Early draft A Arms. Yurns out that while these were simple, the geometry was all wrong! |
|
|
|
|
|
|
|
|
|
|
|
|

|
|
|
|
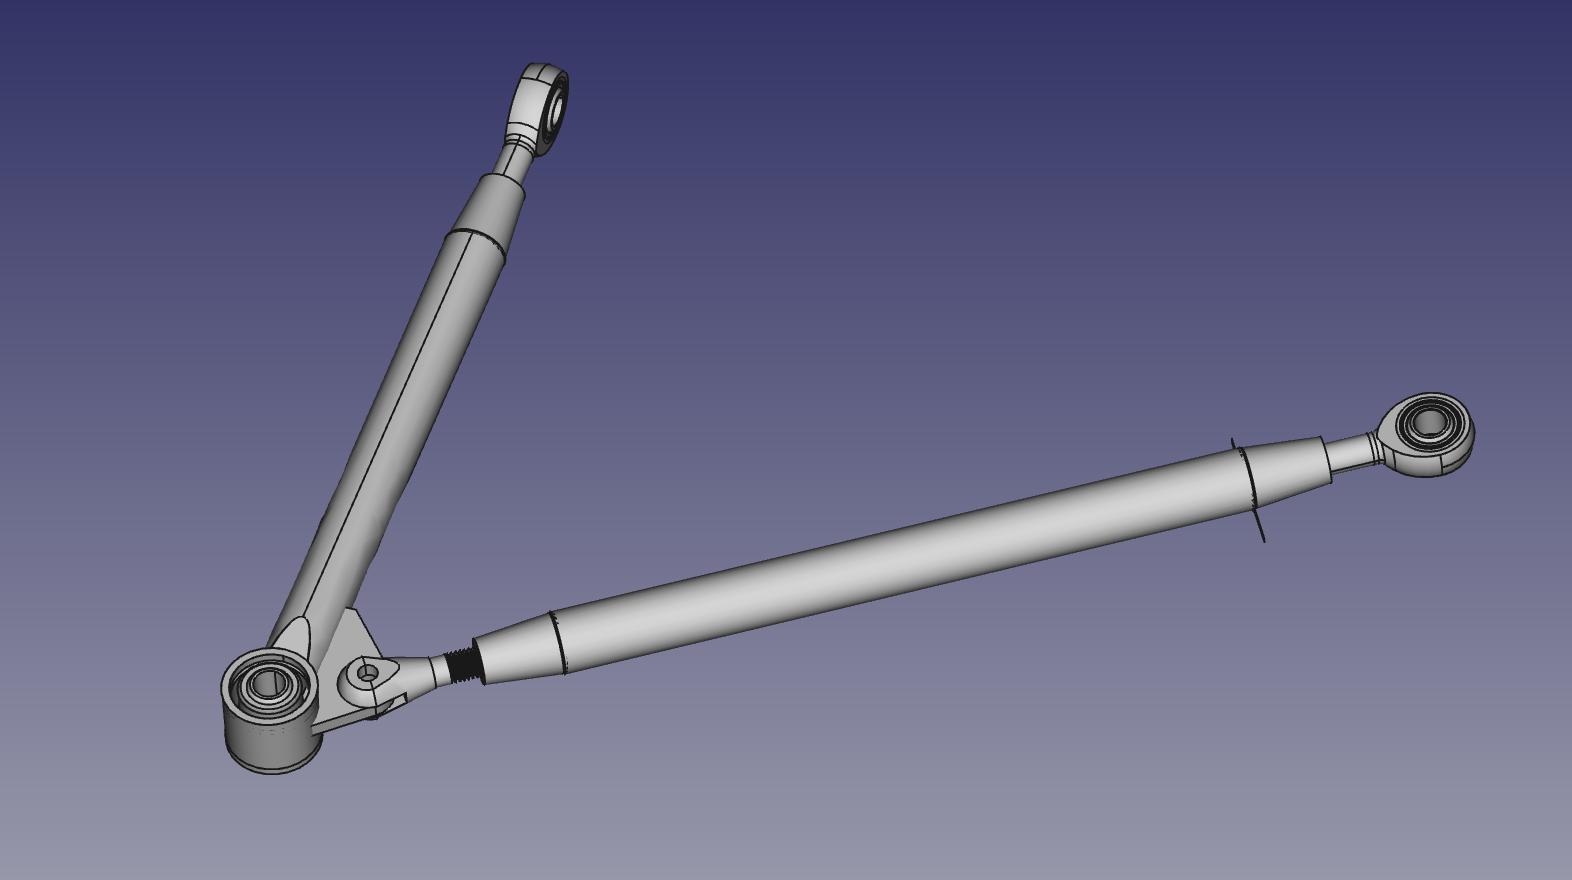
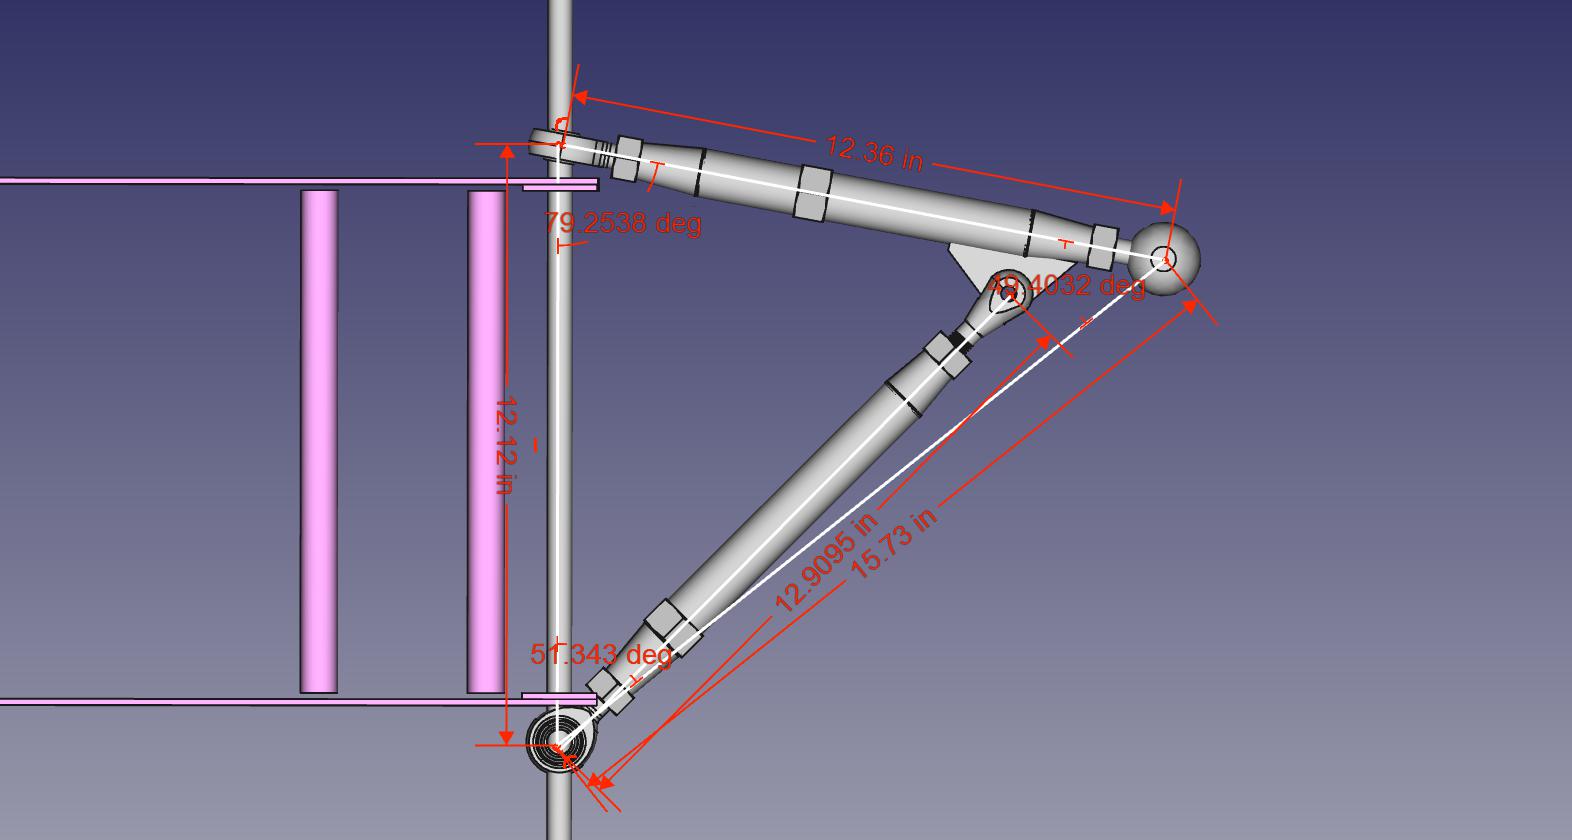
Final design for the lower A Arms |
|
|
|
|
|
|
|
|
|
|
-800.jpg "Scaffolding makes holding things in place and measuring in 3D space SOOOO much easier!")
|
|
|
|
Scaffolding makes holding things in place and measuring in 3D space SOOOO much easier! |
|
|
|
|
|
|
|
|
-800.jpg "Getting a grip on the way the bars work in 3D space in PVC made mistakes much cheaper.")
|
|
|
|
Getting a grip on the way the bars work in 3D space in PVC made mistakes much cheaper. |
|
|
|
|
|
|
|
|
|
|
|
|
|
|
|
|
|
|
.JPG "Look who remembered to put the seat belt anchors in before welding the roll hoop. I cannot imagine trying to do these after the tubes were welded in.")
|
|
|
|
Look who remembered to put the seat belt anchors in before welding the roll hoop. I cannot imagine trying to do these after the tubes were welded in. |
|
|
|
|
|
|
|
|
.JPG "Finally! A 3D Chassis! Damn that was a lot of work!")
|
|
|
|
Finally! A 3D Chassis! Damn that was a lot of work! |
|
|
|
|
|
|
|
|
|
|
.JPG "\"Drivers Cell\" complete with door bars")
|
|
|
|
"Drivers Cell" complete with door bars |
|
|
|
|
|
|
|
|
|
|
.JPG "The obligatory \"scaffolding\" holding everything in place.")
|
|
|
|
The obligatory "scaffolding" holding everything in place. |
|
|
|
|
|
|
|
|
|
|
|

|
|
|
|
Front suspension fixture under fabrication. |
|
|
|
|
|
|
|

|
|
|
|
Front suspension fixture completed and in place |
|
|
|
|
|
|
|
|
.JPG "Rear suspension fixture completed")
|
|
|
|
Rear suspension fixture completed |
|
|
|
|
|
|
|
|
|
|

|
|
|
|
Automotive pornogrpahy... $164 of AN-8 bolys from Aircraft Spruce |
|
|
|
|
|
|
|

|
|
|
|
Tthreaded into the tubes in the front fitment. |
|
|
|
|
|
|
|
.JPG "Working out the angle for the front vertical.")
|
|
|
|
Working out the angle for the front vertical. |
|
|
|
|
|
|
|
|
.JPG "CAD! (Cardboard Aided Design)")
|
|
|
|
CAD! (Cardboard Aided Design) |
|
|
|
|
|
|
|
.JPG "Transferred to 3/16\" steel")
|
|
|
|
Transferred to 3/16" steel |
|
|
|
|
|
|
|
.JPG "Getting the angle spot on!")
|
|
|
|
Getting the angle spot on! |
|
|
|
|
|
|
|
|
.JPG "The vertical completed. Looks like a medieval torture device...")
|
|
|
|
The vertical completed. Looks like a medieval torture device... |
|
|
|
|
|
|
|
|
|
|
|
|
|
|
.JPG "More woodwork. Jig for the rear subframe.")
|
|
|
|
More woodwork. Jig for the rear subframe. |
|
|
|
|
|
|
|
.JPG "Everything in it's place.")
|
|
|
|
Everything in it's place. |
|
|
|
|
|
|
|
.JPG "Finished (almost) article!")
|
|
|
|
Finished (almost) article! |
|
|
|
|
|
|
|
|

|
|
|
|
More woodwork, for fat bottomed girls. |
|
|
|
|
|
|
|
.JPG "Jig for the rear end upper bars.")
|
|
|
|
Jig for the rear end upper bars. |
|
|
|
|
|
|
|
.JPG "Rear upper bars tacked in!")
|
|
|
|
Rear upper bars tacked in! |
|
|
|
|
|
|
|
|
.JPG "Jig to hold the rear subframe in place - note the error")
|
|
|
|
Jig to hold the rear subframe in place - note the error |
|
|
|
|
|
|
|
.JPG "First effort at reaming suspension bolt holes! Allright! :-)")
|
|
|
|
First effort at reaming suspension bolt holes! Allright! :-)
|
|
|
|
|
|
|
|
.JPG "First go at a suspension bracket...")
|
|
|
|
First go at a suspension bracket... |
|
|
|
|
|
|
|
|
|
|
.JPG "... and a finished job ...")
|
|
|
|
... and a finished job ... |
|
|
|
|
|
|
|
|
.JPG "Bollocks! 7/16\" washers actually had an internal diameter of 0.513\" so the bolt's as loose as a tarts underwear!")
|
|
|
|
Bollocks! 7/16" washers actually had an internal diameter of 0.513" so the bolt's as loose as a tarts underwear! |
|
|
|
|
|
|
|
.JPG "Front end all setup for welding!")
|
|
|
|
Front end all setup for welding! |
|
|
|
|
|
|
|
|
|
|
|
.JPG "Fitting the engine and the rear subframe.")
|
|
|
|
Fitting the engine and the rear subframe. |
|
|
|
|
|
|
|
|
|
|
.JPG "Rear subframe all mounted!")
|
|
|
|
Rear subframe all mounted! |
|
|
|
|
|
|
|
|
|
|
|
|
.JPG "Nifty little jacks made from angle iron and a bolt welded to it enable accurate placement of the motor and transmission")
|
|
|
|
Nifty little jacks made from angle iron and a bolt welded to it enable accurate placement of the motor and transmission
|
|
|
|
|
|
|
|
|
.JPG "If at first you dont succeed.")
|
|
|
|
If at first you dont succeed. |
|
|
|
|
|
|
|
|
.JPG "Rear lower suspension mounts!")
|
|
|
|
Rear lower suspension mounts! |
|
|
|
|
|
|
|
.JPG "Rear lower suspension mount.")
|
|
|
|
Rear lower suspension mount.
|
|
|
|
|
|
|
|
.JPG "Ooooooh! Pressies from Summit Racing!")
|
|
|
|
Ooooooh! Pressies from Summit Racing! |
|
|
|
|
|
|
|
|
.JPG "Look at all that shiny loveliness!")
|
|
|
|
Look at all that shiny loveliness! |
|
|
|
|
|
|
|
.JPG "Motor mount - drivers side")
|
|
|
|
Motor mount - drivers side |
|
|
|
|
|
|
|
|
|
|
.JPG "Seat mount - drivers side")
|
|
|
|
Seat mount - drivers side |
|
|
|
|
|
|
|
.JPG "Getting the front end of the chassis all welded in and \"linished\"")
|
|
|
|
Getting the front end of the chassis all welded in and "linished" |
|
|
|
|
|
|
|
|
.JPG "Making a little room for the steering column")
|
|
|
|
Making a little room for the steering column |
|
|
|
|
|
|
|
.JPG "The plan of the modified front lower wishbone...")
|
|
|
|
The plan of the modified front lower wishbone... |
|
|
|
|
|
|
|
.JPG "... which became the jig...")
|
|
|
|
... which became the jig... |
|
|
|
|
|
|
|
|
.JPG "... which became cut metal...")
|
|
|
|
... which became cut metal... |
|
|
|
|
|
|
|
.JPG "... which became a lower wishbone!")
|
|
|
|
... which became a lower wishbone! |
|
|
|
|
|
|
|
|
|
|
.JPG "First pieces I've machined in nearly 40 years!")
|
|
|
|
First pieces I've machined in nearly 40 years! |
|
|
|
|
|
|
|
.JPG "The insert get pushed into the retainers at the end of the lower wishbone.")
|
|
|
|
The insert get pushed into the retainers at the end of the lower wishbone. |
|
|
|
|
|
|
|
|
|
|
|
|
|
|
|
|
|
.JPG "The M16 (*ahem*) rod end!")
|
|
|
|
The M16 (*ahem*) rod end! |
|
|
|
|
|
|
|
|
|
|
|
|
|
|
|
|
|
|
|
|
|
.JPG "Welding distortion... :-(")
|
|
|
|
Welding distortion... :-( |
|
|
|
|
|
|
|
|
|
|
|
.JPG "Two completed lower front wishbones.")
|
|
|
|
Two completed lower front wishbones. |
|
|
|
|
|
|
|
.JPG "Starting to come together...")
|
|
|
|
Starting to come together... |
|
|
|
|
|
|
|
|
|
.JPG "Everything where it should be!")
|
|
|
|
Everything where it should be! |
|
|
|
|
|
|
|
|
|
|
|
|
|
.JPG "Rear suspension complete too!")
|
|
|
|
Rear suspension complete too! |
|
|
|
|
|
|
|
|
|
|
|
|
|
|
|
|
|
|
|
|
|
|
|
|
|
|
|
|
|
|
|
|
|
|
|
|
|
|
|
|
|
|
|
|
|
|
|
|
|
|
|
|
|
|
|


-800.jpg "Scaffolding makes holding things in place and measuring in 3D space SOOOO much easier!")
-800.jpg)
-800.jpg "Getting a grip on the way the bars work in 3D space in PVC made mistakes much cheaper.")
-800.jpg)
-800.jpg)
-800.jpg)
-800.jpg)
.JPG)
.JPG "Mmmmm! Nice fit!")
.JPG)
.JPG)
.JPG "Look who remembered to put the seat belt anchors in before welding the roll hoop. I cannot imagine trying to do these after the tubes were welded in.")
.JPG "Finally! A 3D Chassis! Damn that was a lot of work!")
.JPG)
.JPG)
.JPG "\"Drivers Cell\" complete with door bars")
.JPG)
.JPG)
.JPG "The obligatory \"scaffolding\" holding everything in place.")
.JPG)
.JPG "That'll do son!")
.JPG "Tacked in place!")


.JPG "Rear suspension fixture completed")
.JPG)
.JPG)


.JPG "Working out the angle for the front vertical.")
.JPG "CAD! (Cardboard Aided Design)")
.JPG "Transferred to 3/16\" steel")
.JPG "Getting the angle spot on!")
.JPG "The vertical completed. Looks like a medieval torture device...")
.JPG "Fits good!")
.JPG "Tacked in place")
.JPG "Finished piece.")
.JPG "Front end looking good")
.JPG "Vroom, vroom!")
.JPG "More woodwork. Jig for the rear subframe.")
.JPG "Everything in it's place.")
.JPG "Finished (almost) article!")

.JPG "Jig for the rear end upper bars.")
.JPG "Rear upper bars tacked in!")
.JPG "Jig to hold the rear subframe in place - note the error")
.JPG "First effort at reaming suspension bolt holes! Allright! :-)")
.JPG "First go at a suspension bracket...")
.JPG "... washer welded ...")
.JPG "... relief cut ...")
.JPG "... and a finished job ...")
.JPG "Bollocks! 7/16\" washers actually had an internal diameter of 0.513\" so the bolt's as loose as a tarts underwear!")
.JPG "Front end all setup for welding!")
.JPG)
.JPG "End results! Nice!")
.JPG "Anyone spot the problem?")
.JPG "Fitting the engine and the rear subframe.")
.JPG)
.JPG)
.JPG "Rear subframe all mounted!")
.JPG)
.JPG)
.JPG)
.JPG "Nifty little jacks made from angle iron and a bolt welded to it enable accurate placement of the motor and transmission")
.JPG)
.JPG "If at first you dont succeed.")
.JPG "Rear lower suspension mounts!")
.JPG "Rear lower suspension mount.")
.JPG "Ooooooh! Pressies from Summit Racing!")
.JPG "Look at all that shiny loveliness!")
.JPG "Motor mount - drivers side")
.JPG "View from rear")
.JPG "Gearbox mount")
.JPG "Seat mount - drivers side")
.JPG "Getting the front end of the chassis all welded in and \"linished\"")
.JPG "Making a little room for the steering column")
.JPG "The plan of the modified front lower wishbone...")
.JPG "... which became the jig...")
.JPG "... which became cut metal...")
.JPG "... which became a lower wishbone!")
.JPG "A small distraction.")
.JPG "Lovely cuts!")
.JPG "First pieces I've machined in nearly 40 years!")
.JPG "The insert get pushed into the retainers at the end of the lower wishbone.")
.JPG "And pushed home.")
.JPG "Lower wishbone.")
.JPG "Front left suspension.")
.JPG)
.JPG)
.JPG "Brass heatsink")
.JPG "As advertized!")
.JPG "The M16 (*ahem*) rod end!")
.JPG "Starting on the rockers")
.jpg "Thumbprint!")
.JPG "Rock on!")
.JPG "Upper wishbone")
.JPG "Front left suspension")
.JPG "Push rod mounting tabs")
.JPG "90% complete")
.JPG "With balljoint")
.JPG)
.JPG)
.JPG "Welding distortion... :-(")
.JPG "Both the same ... doh!")
.JPG "That's better!")
.JPG "Detail")
.JPG "Two completed lower front wishbones.")
.JPG "Starting to come together...")
.JPG)
.JPG "Everything where it should be!")
.JPG)
.JPG)
.JPG "Front end complete!")
.JPG "From the other side!")
.JPG "Rear suspension complete too!")
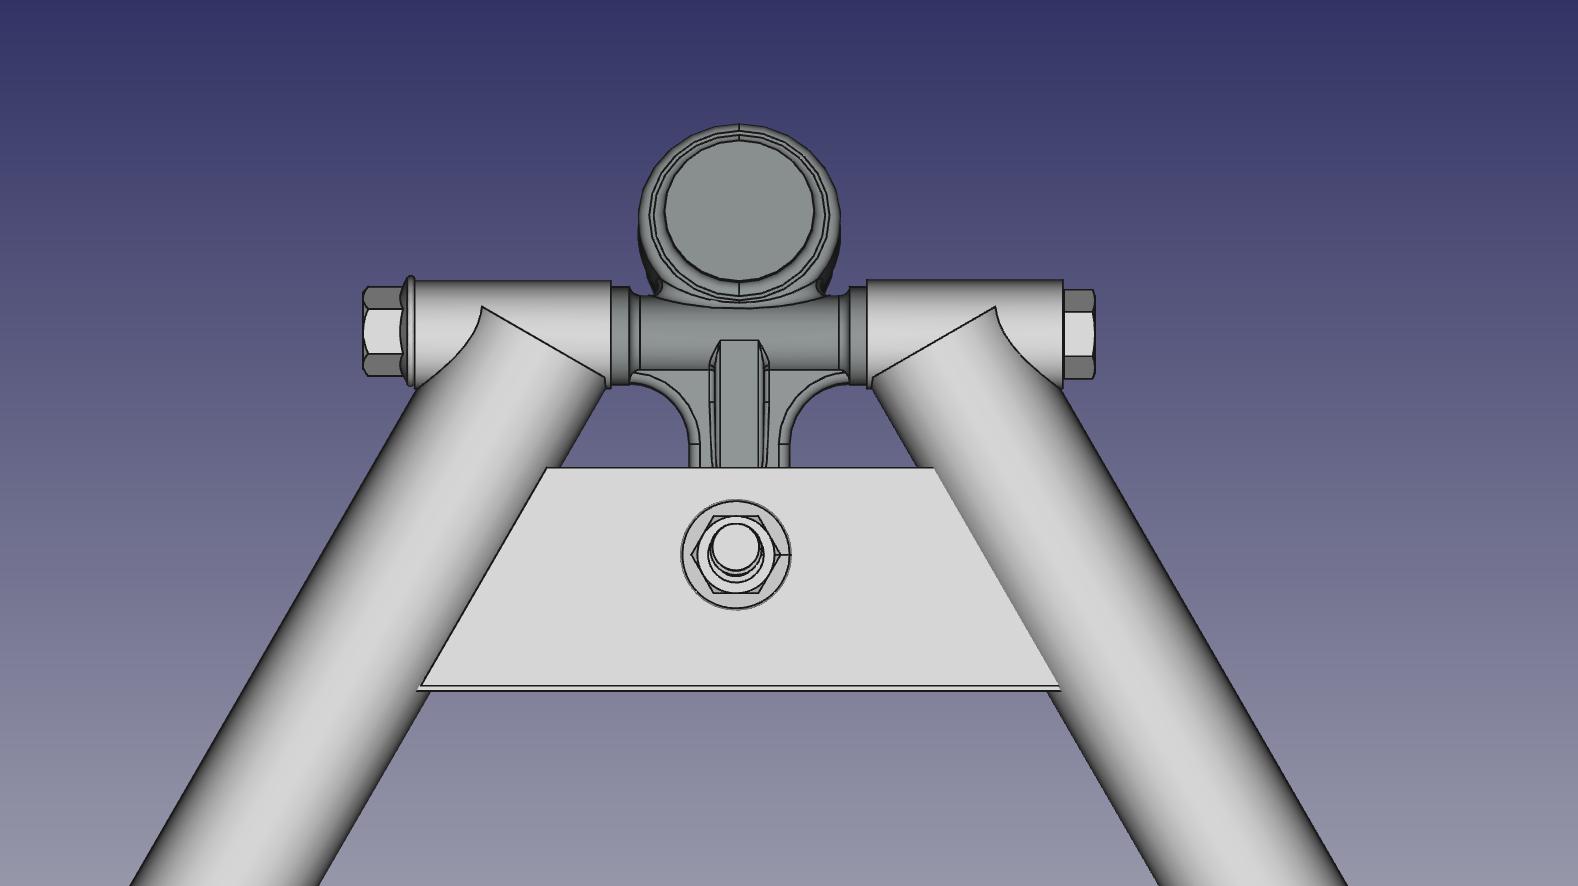
.JPG "Torque mount")
.JPG "Rear suspension")
.JPG)
.JPG)
.JPG)
.JPG)
.JPG)
.JPG)
.JPG)
.JPG)
.JPG)
.JPG)
.JPG)
.JPG)
.JPG)
.JPG)
.JPG)
.JPG)
.JPG)
.JPG)
.JPG)
.JPG)
.JPG)
.JPG)
.JPG)
.JPG)
.JPG)
.JPG)
.JPG)
.JPG)
.JPG)
.JPG)
.JPG)
.JPG)
.JPG)